Scrappy Little Hearts: A Finished Quilt

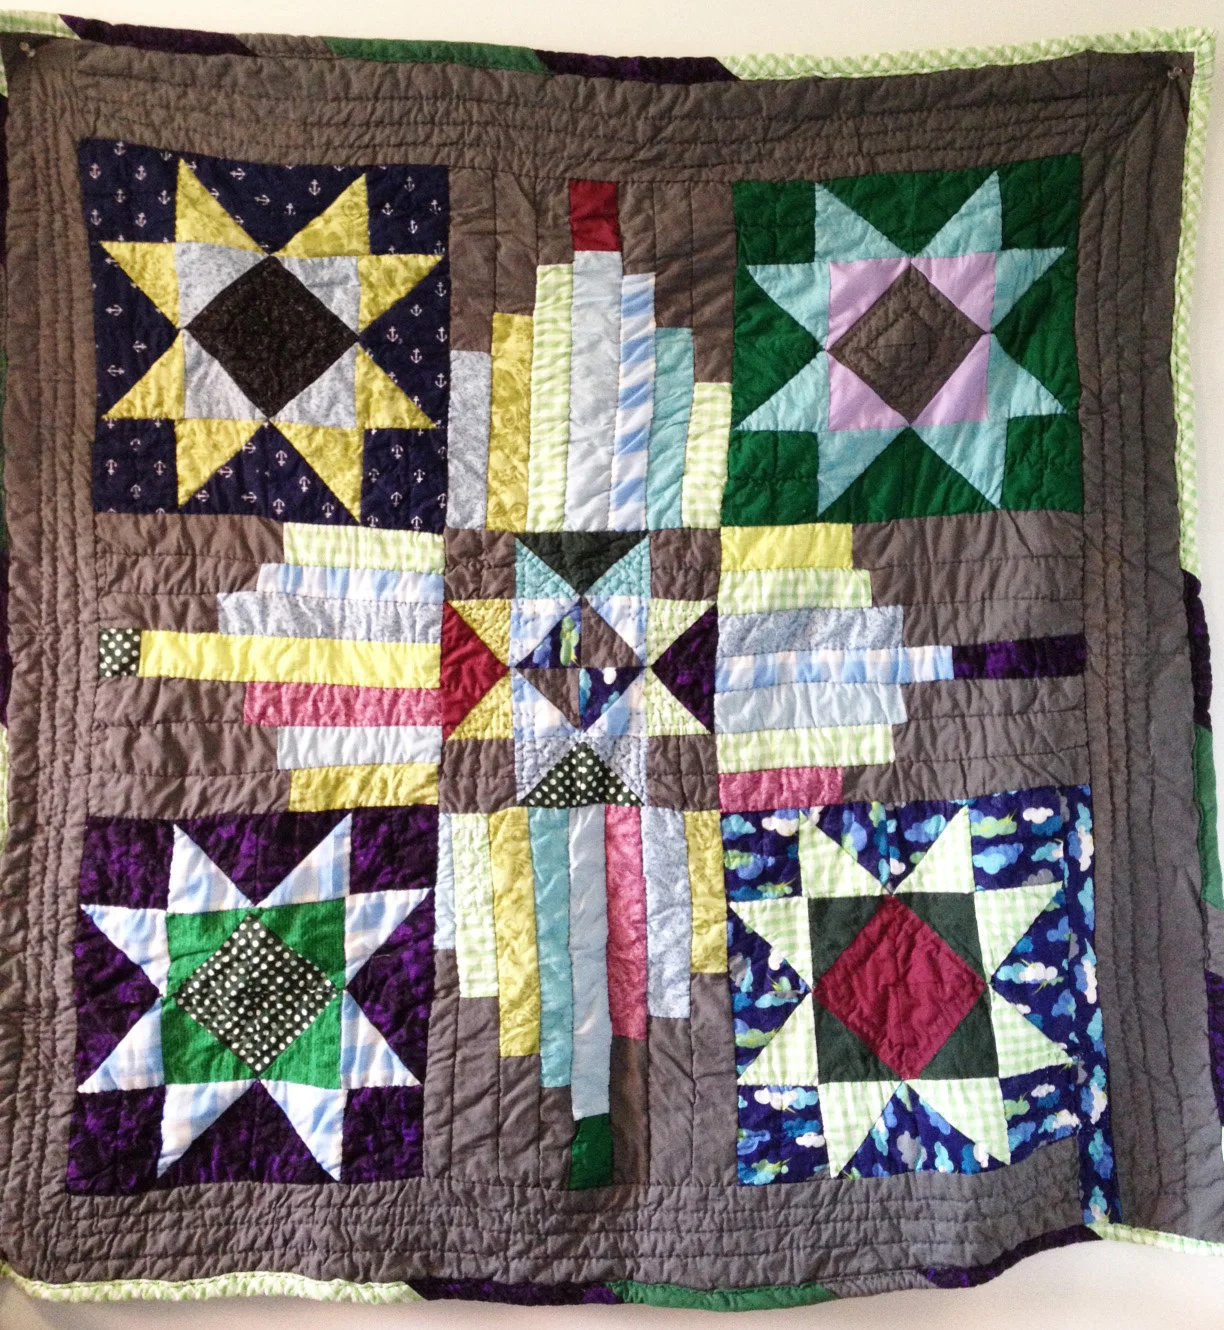
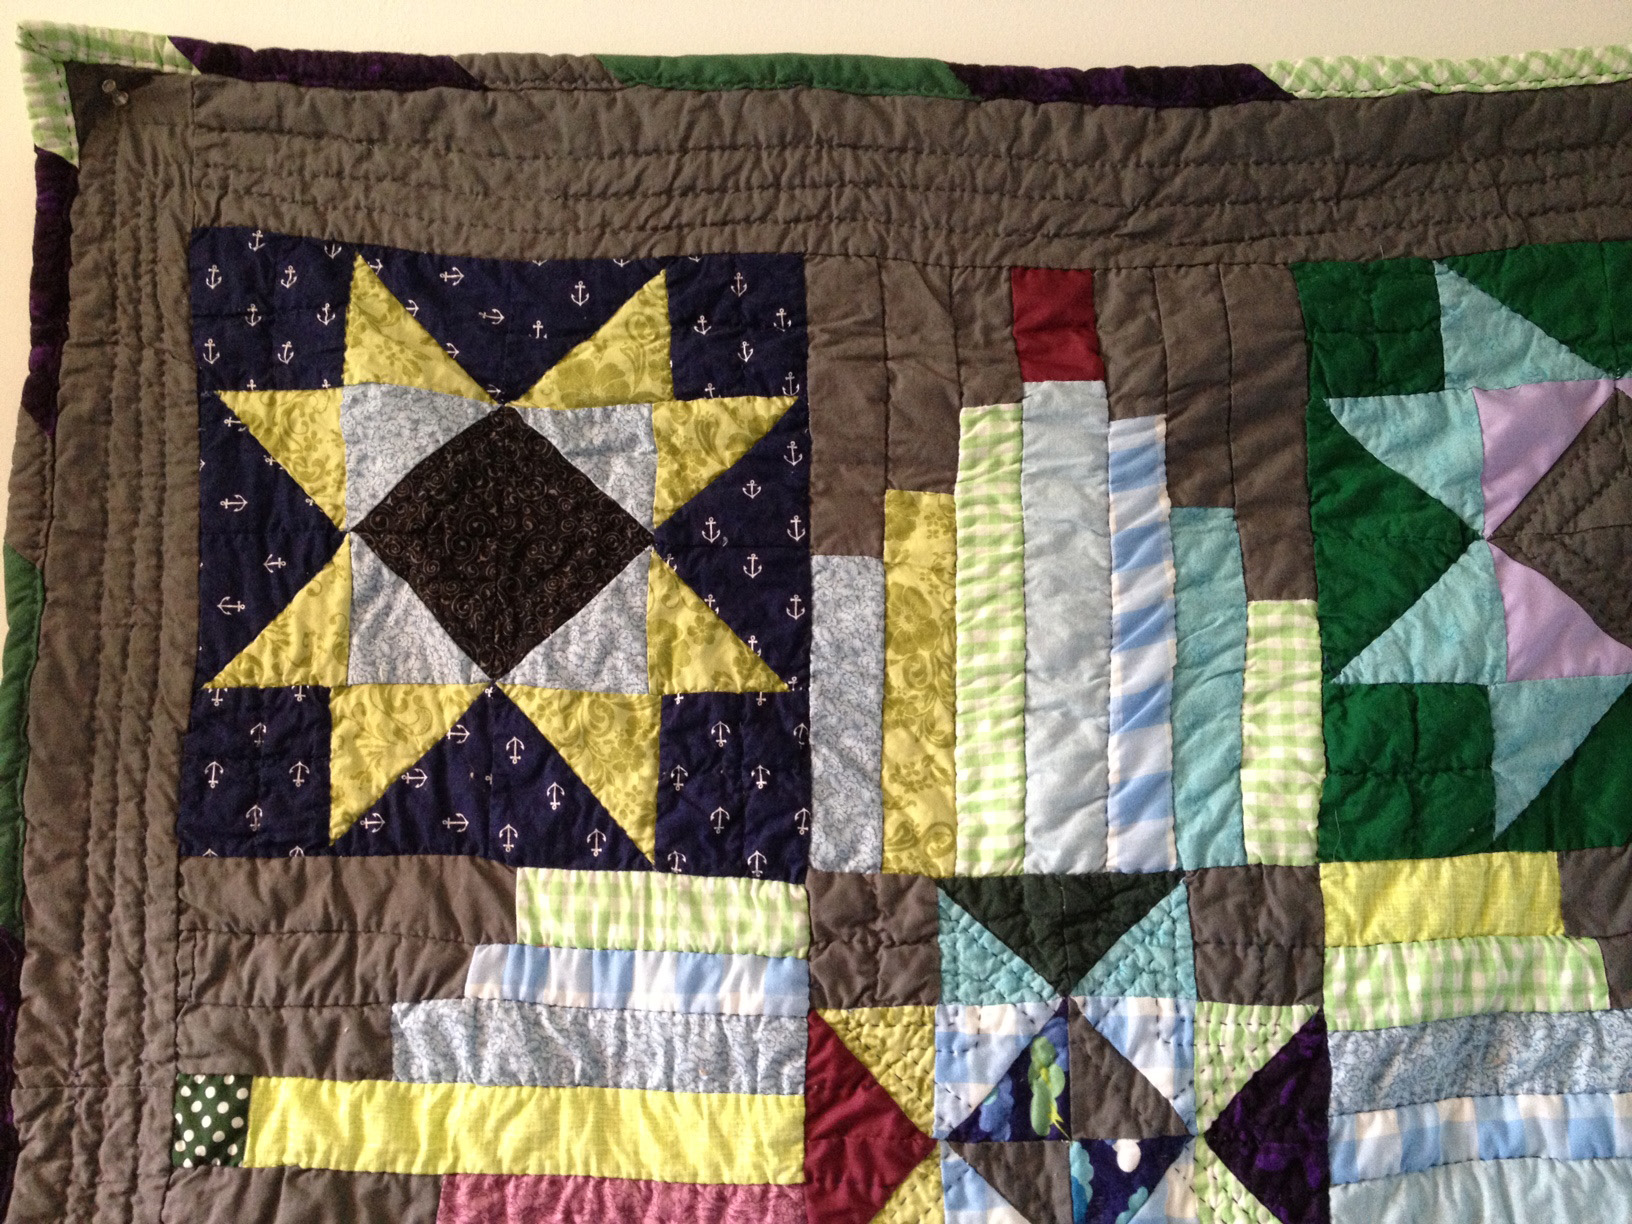
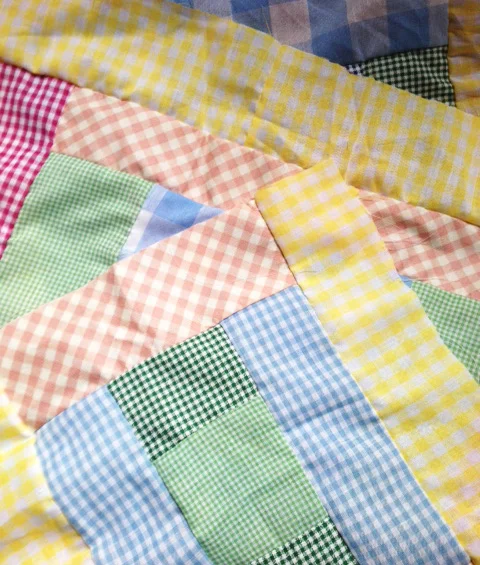
This little strangely shaped quilt started out when I saw Cluck Cluck Sew's heart block pattern. I know a lot of people fell in love with this block this year. I didn't really have a plan after I made the blocks. 

But after I made them, I couldn't let them rest.  I had other projects I was working on but the little hearts called to me. 

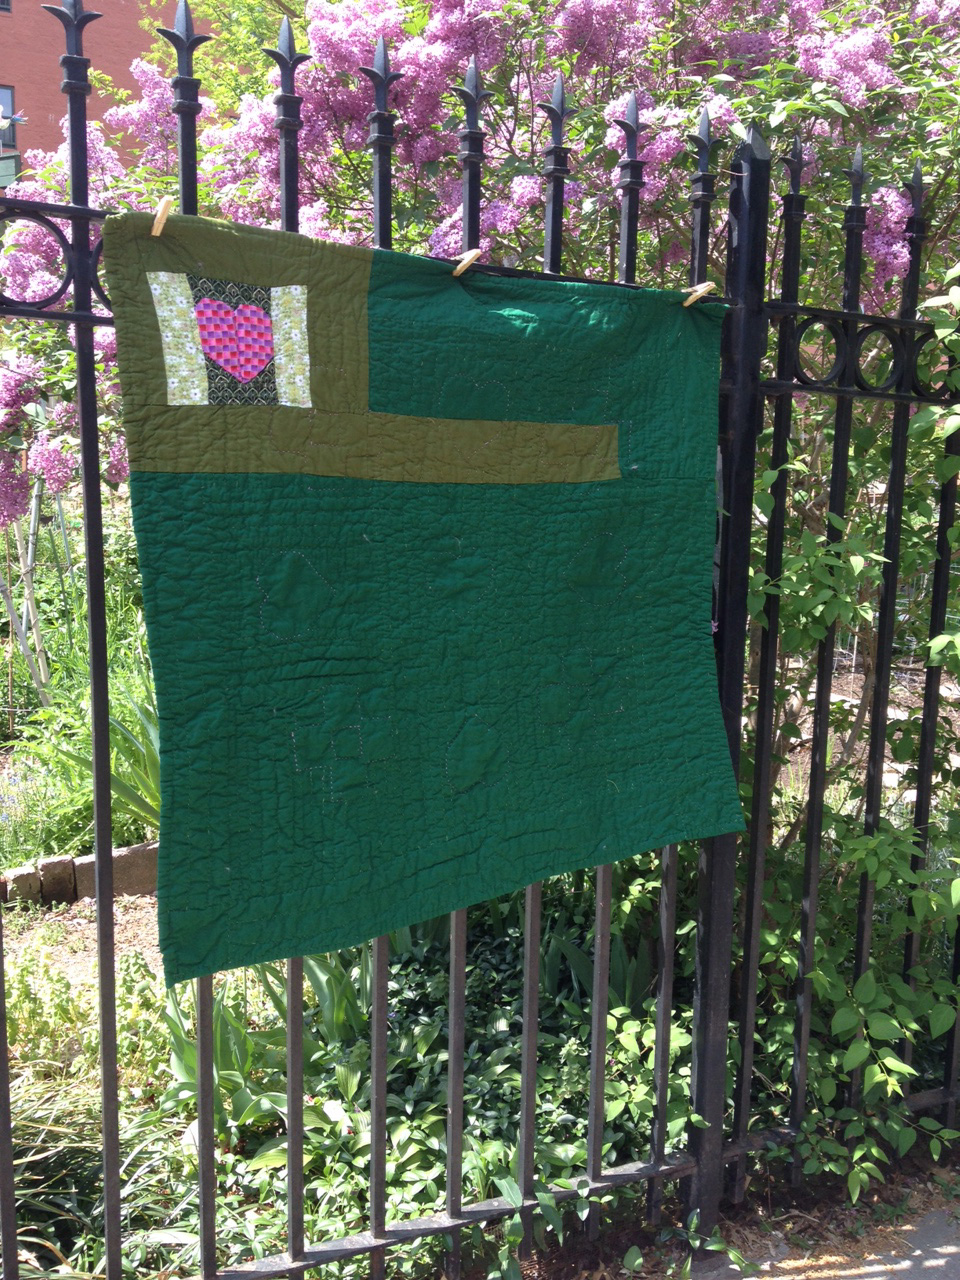
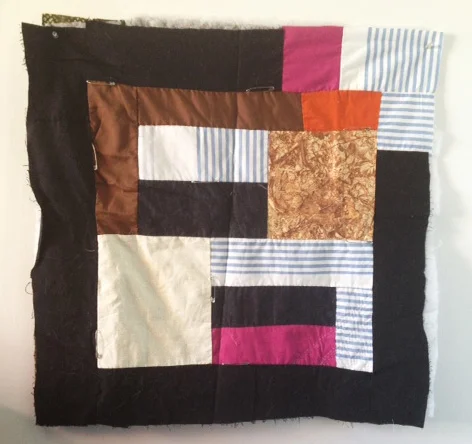
I knew I also wanted to scrap bust this year, so I pulled a ton of green scraps and started to create wonky courthouse steps around the hearts. I linked it all together with some 9 patches in purples, mimicking the checks in the hearts. The quilt was looking a little crazy at this point so I added some calming solid boarders. 

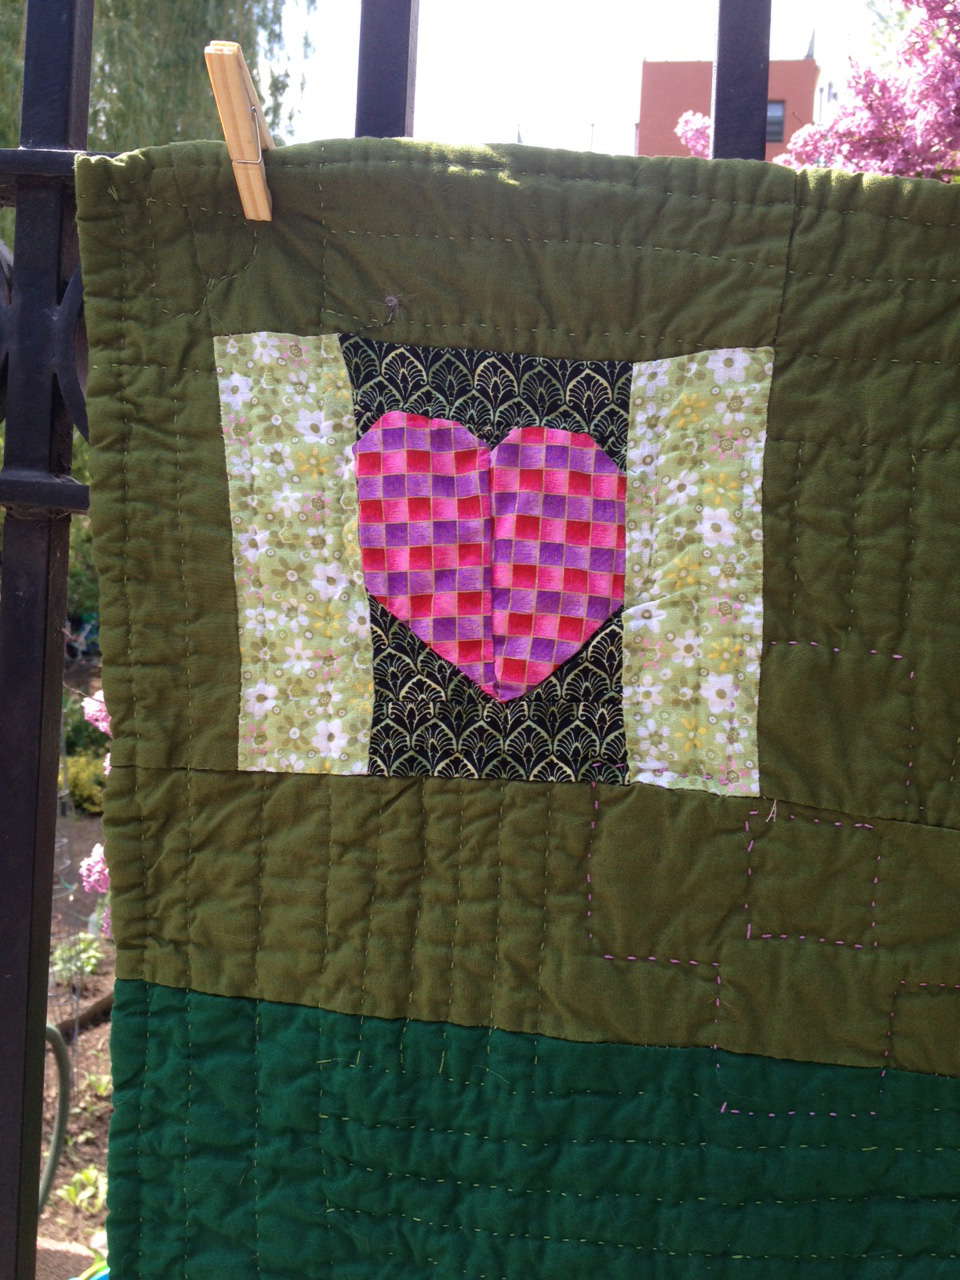
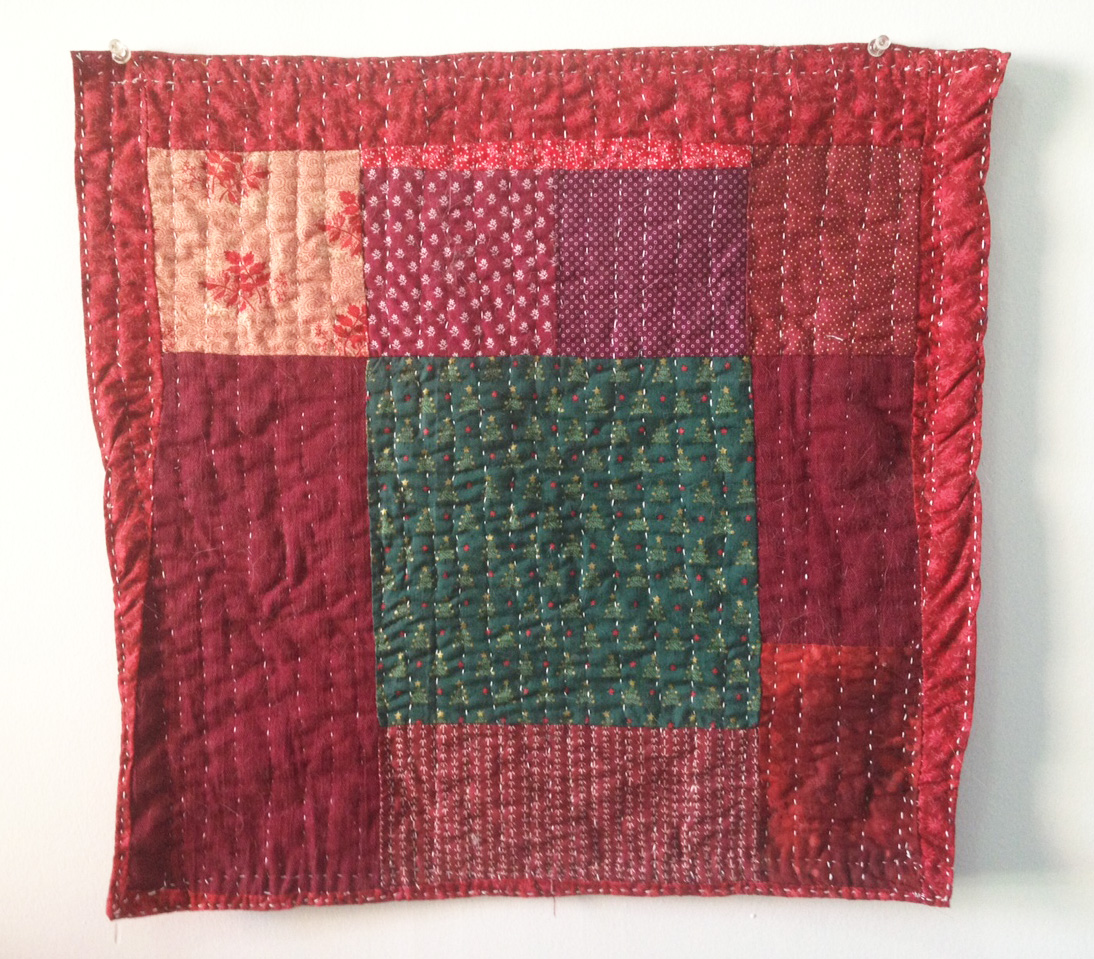
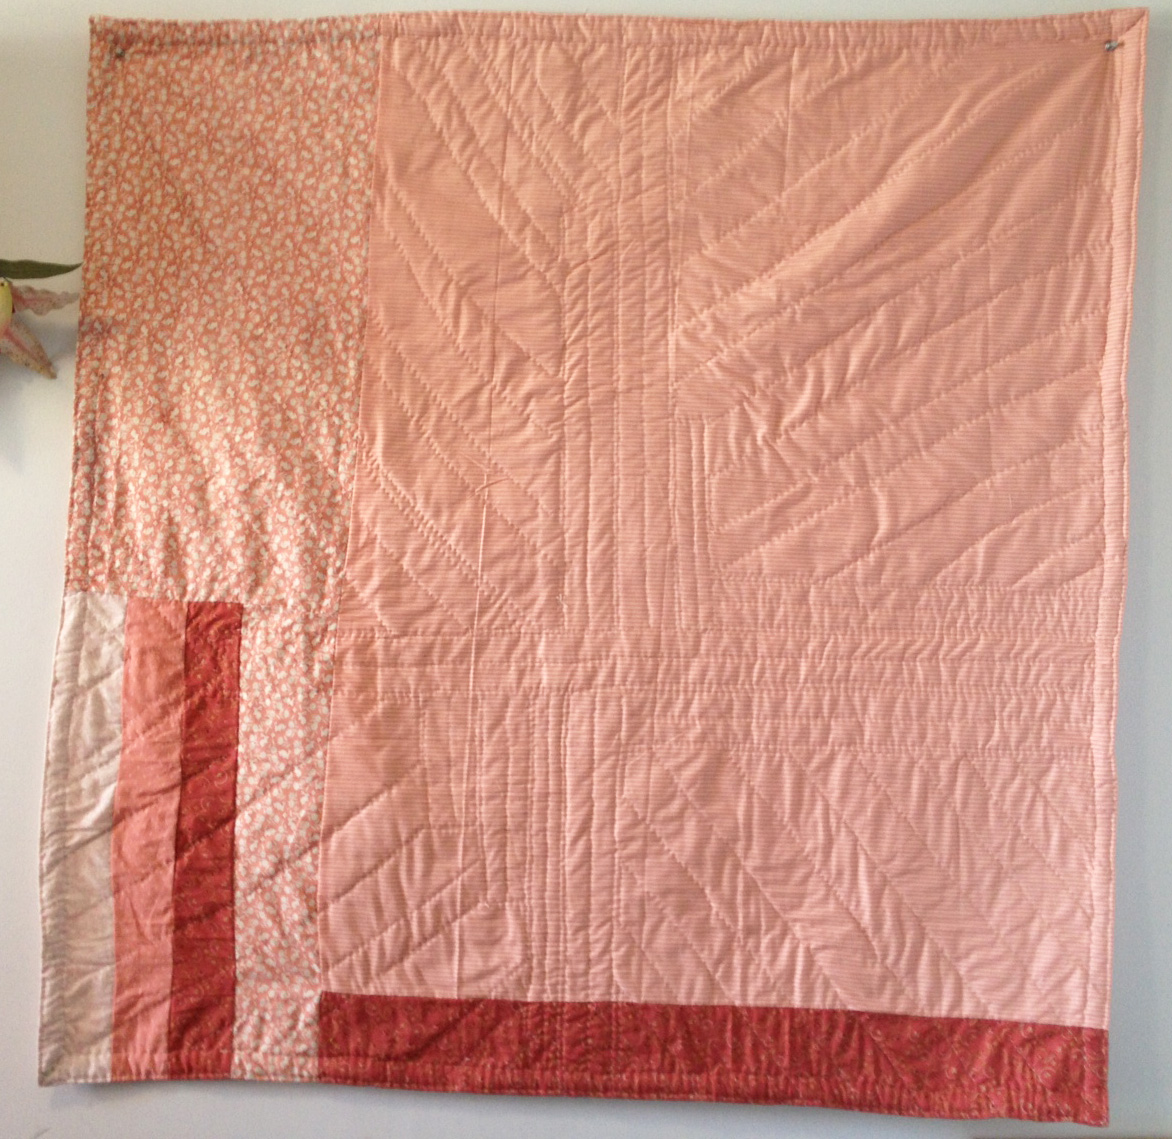
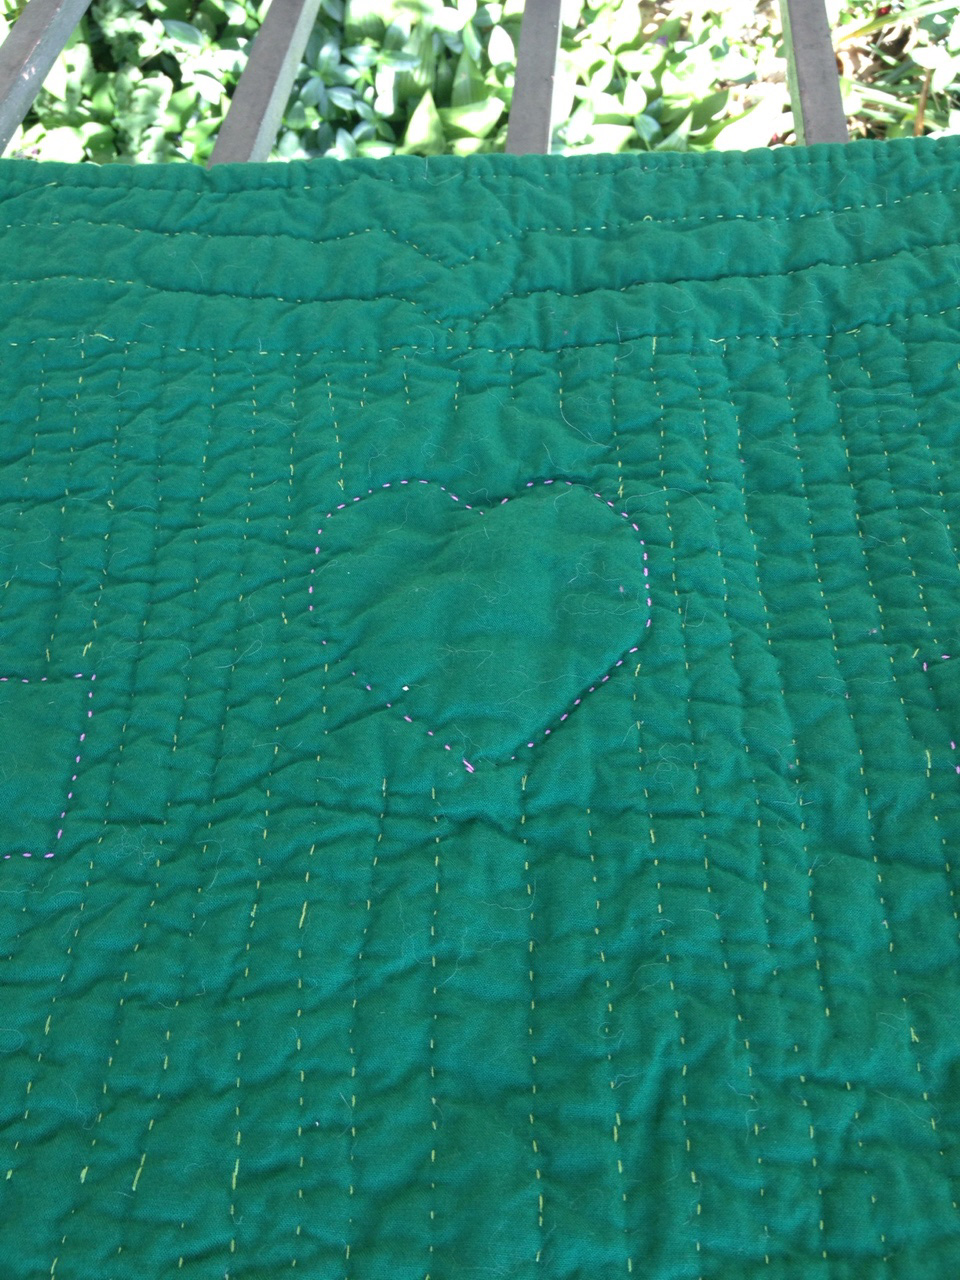
I used the last heart block, and most crooked and crazy, for the back, as well as more solids. I sandwiched top and back together with some scrappy batting.  I used purple pearl cotton to go around each heart on the top and each 9 patch. Then used light green cotton thread to densely quilt the rest of the top. I embellished the boarders and back heart. 

I made a thin rolled boarder to finish it all off. Bc of the improv piecing, this quilt is a crazy shape and all crooked. It kinda averages at 37" x 37" but is measures as wide as 39" in some places. 

Pit was the biggest helper on this little quilt. He knows it would make a cute baby quilt, or play mat, or wall hanging. 

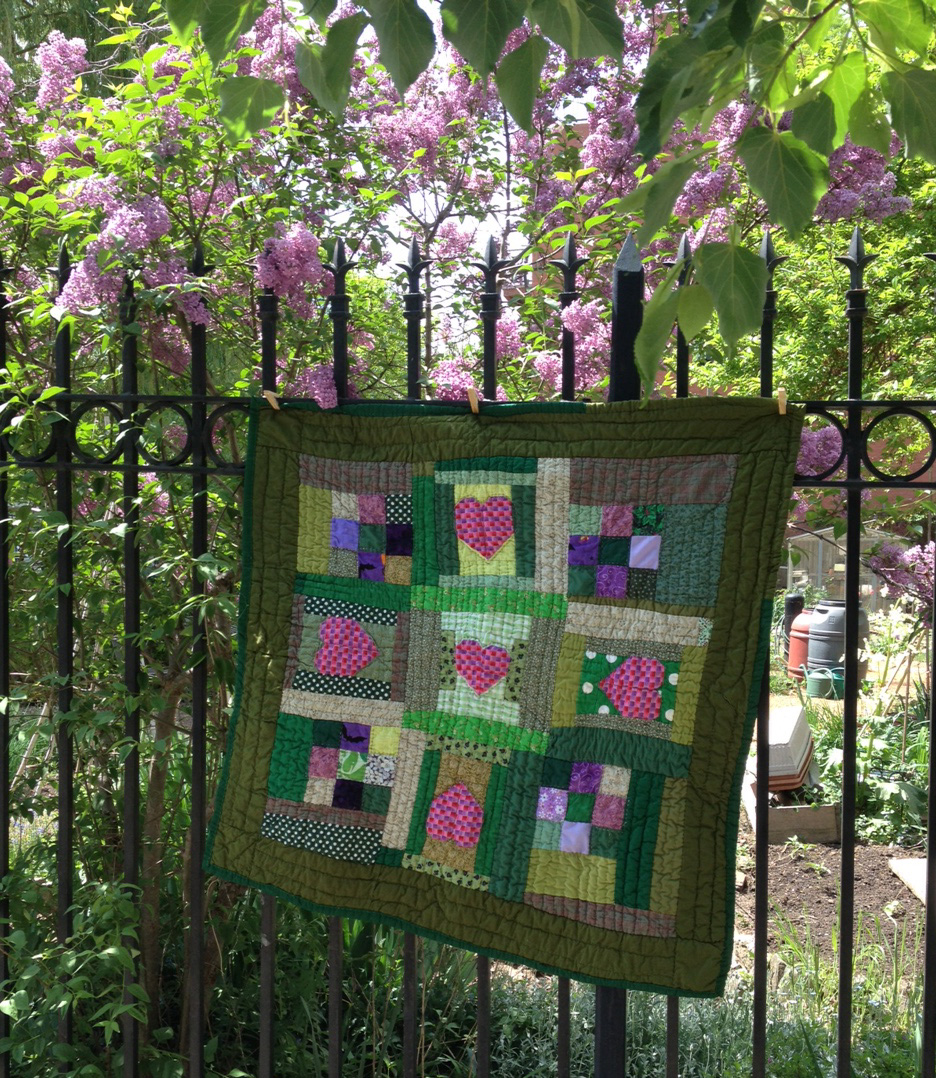
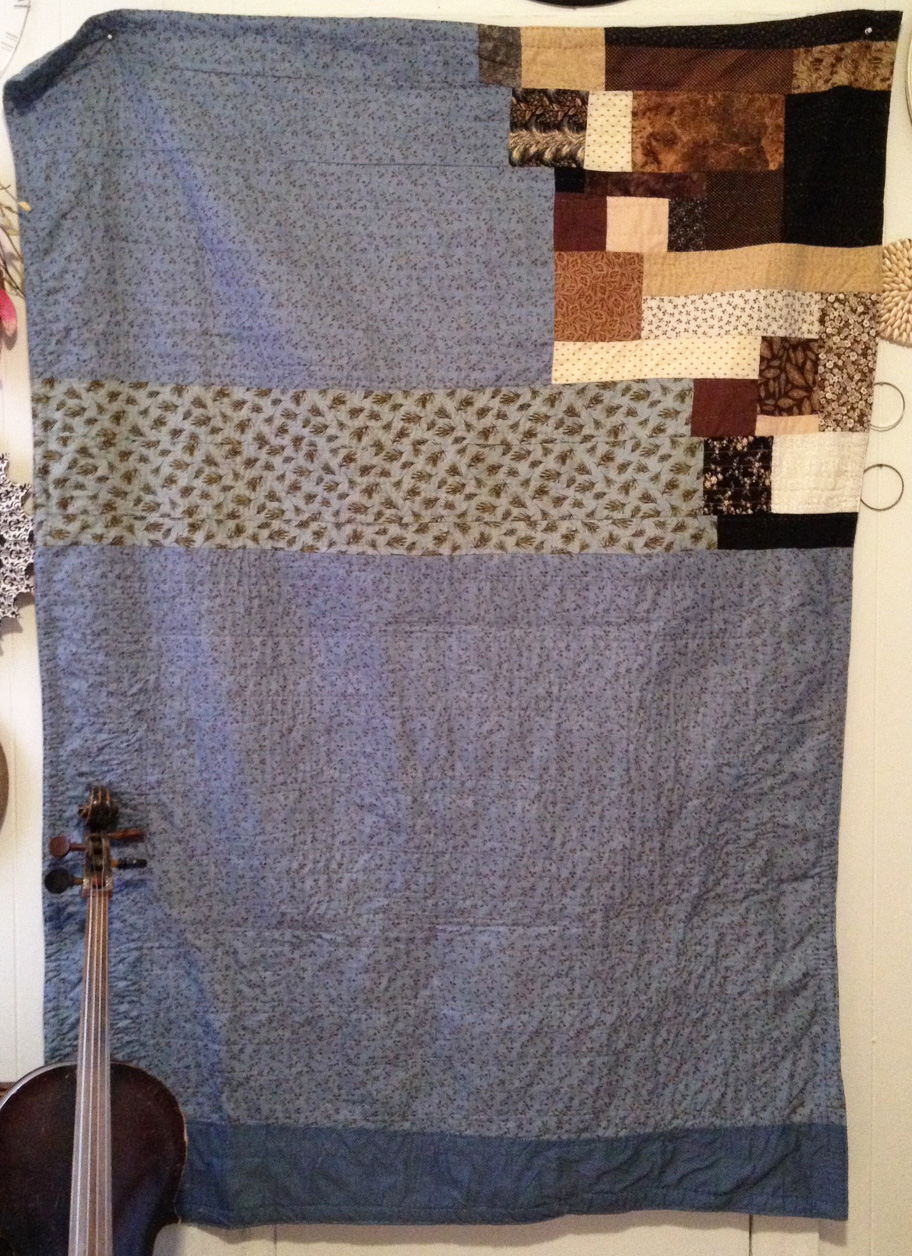
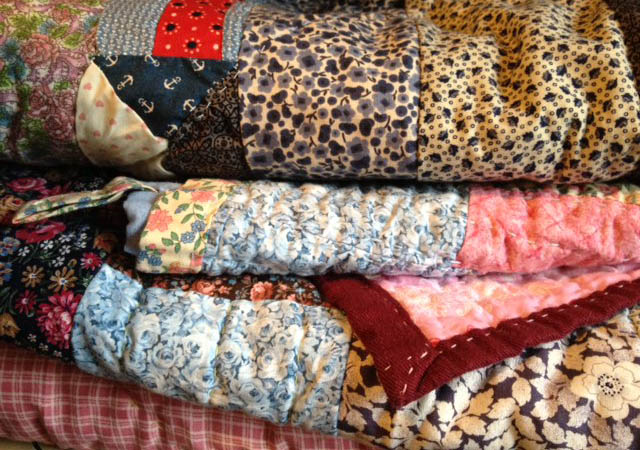
I washed this quilt and it got nice and crinkly. I was a little worried about how it would wash bc I used a bunch of different fabrics for the top. Mostly cotton but also some velveteen, and wool, as well as blends. This quilt doesn't have a label yet. 

This is my first finish of Q2 of the 2015 Finish Along. I have a feeling I'm not gonna get as much done this quarter, but I'm happy with this little finish!

Label Maker

Everyone knows you should always label all your quilts. 

But like many, I didn't start out labeling my quilts. It's only recently that I realized how much I wanted all my quilts to be identifiable as mine. Many of my early quilts may one day go unknown ... But that's ok, too. I kind of enjoy the idea of future people puzzling over them. 

For as many quilters there are, there are ways to label your quilt. So far, my quilt labels have all been lino cuts, or stamps that I created myself. I imagine it give my quilts a punk rock jacket kind of look. 

There's also a wide variety of info that can be conveyed on a quilt label. I like to keep it simple. I put the name of the quilt, the month and year it was completed, my name (well, my moniker)... and that's about it. 

There's so much cat hair in the world, but I seem to have the majority of it. 

There's so much cat hair in the world, but I seem to have the majority of it. 

I created a Pinterest Board with some lovely examples and ideas for quilt labels. I also included some stamp making ideas if you want to try it my way!

I'm adding this to my Q1 2015 Finish Along finishes. Check out On the Windy Side for more info on the 2015 Finish Along. One of my Q1 goals was to repair and label a quilt for a friend. Done!

What's your favorite technique for labeling your quilts?


Mat Finish

I can't even tell you how long ago this finish was started. It must have been several years, at least. But in early December 2014, it was finished!

As I dimly recall, this "quilt" was started by just having lovely pieces of fabric near each other and the uncontrollable urge to sew them together. I remember that these were sewn together long ago with no real plan. And I remember later forming a plan to make an insanely long quilted strip of pieces like these. That plan never came into fruition, and the top for this mat was left to the WIP bin. After being bagged, un-bagged, tossed around, etc... It eventually made it's way to a chair top for many months where Flounder became quite taken with it. 

A few months ago, I cleaned it up, tried to get as much of the cat hair off of it as I could, made a back for it, and basted it. Then it sat in a new WIP pile, for a few weeks, and was later quilted while my friend was in town. 

I had been looking for a project to do a fan style quilting on and this was perfect. Having never used a fan design, I was worried it might be hard, or slow, so starting with something small was great! The quilting actually went surprisingly fast. I used acrylic black thread for quilting the fan designs, and I think that made a difference. Acrylic really glides thru the quilt as opposed to natural thread, whcih sometimes get caught or travel slowly. The hardest part of quilting this quilt was that some of the fabric is quite dark and made it hard to see the stitching while sewing.   

The fabrics in this quilted mat are mostly new from various fat quarters, but there are also some recycled clothes and a bit of vintage. I pieced the back with most black, some old but not vintage stars, and a bit of vintage purple which was also a backing on another quilt.  The batting was also a left over scrap. Since my quilts are never any particular size, and certainly not a standard size, I seem to always have batting scraps laying about. I folded over the backing to make the binding but only did one line of stitching, where I usually do two. This is partly laziness on my part, but also I envision this quilt to be super soft and easy to fold, roll, and carry. 

This mat quilt is approximately 50" x 22", Which is a pretty weird shape for a quilt. I see this quilt being small and portable and taken where ever you go. It can be used as a mat for yoga or exercise, taken to the park or beach and used as a seat, folded as a chair mat or to give you a little extra back support, laid out for a cat or baby mat. It could also be used as a table/dresser topper or bed runner, but I picture it being more versatile and utilized. It's really soft and a little puffy. I really love the way the fans are very clear and noticeable even though sometimes they are black on black. 

I still have to label this quilt and write up it's entry in my quilt journal. But it was very satisfying to finish such an old WIP!! It definitely made me get out my unfinished works and assess them for potential finishes! It was also nice that this quilt had some firsts: First oddly shaped finished quilt and first fan quilting design.  

I'm linking this post up with Kathey's Quilts for Slow Sunday Stitching

Friendship Mini: A Finished Quilt

Right on the heels of making my first friendship stars, I started playing around with the scale of the stars. And this mini quilt was born!

This quilt has a name and was made for someone. But if I revealed the name, it would give away the surprise!

This mini measures approximately 31" x 31" and the star is about 25" x 25". The center of the star has vintage heart fabric and new anchor fabric. The points are the same vintage polka dots that I backed the First Friendship Quilt with. The background for the star is vintage green gingham. The sashing is a new dark blue fabric with multi colored bubbles. 

The backing is a deep green floral/paisley that was a gift from a friend. It has stripes of the same anchors and bubbles from the front. Both are new fabric bought on Fabric.com, I believe. 

I did a lot of hand stitching with light blue pearl cotton in and around the star, but left the dark blues un-quilted. I used my fold over double stitched method for the binding.  I like how heavy the quilting is, but there are still areas that are blank. 

I'm pretty sure that I used a scrap of batting left over from the First Friendship Quilt for this mini. All the quilting makes this one pretty snuggly. It would be perfect for a baby quilt or baby mat, and it makes for a nice pet quilt, as well. 

Tom was most helpful in the making of this quilt. Bippi wanted to help, but it was too small to work on and have her sit under, so she was mostly just annoyed. 

qfa 1.jpg

I haven't labeled this mini, yet, but I have washed it. It's very soft and supple.  Unfortunately while taking these photos, I noticed that the binding did not catch in one part of the quilt!

I knew I was cutting it pretty close,  but I've never had this happen before!! So, along with a label, this quilt will need a little repair before it heads to it's new home. 

Since all my quilts are hand pieced, basted, quilted and bound, I like to link up with Kathy's Slow Stitching Sunday when I can!

A Finish in August

Finally!

Stars for NFG 2014 (quilt for Crimson)

Stars for NFG 2014 (quilt for Crimson)

Front detail.

Front detail.

My last finish was way back in February of this year, and that's too long ago!

The back. 

The back. 

Back detail.

Back detail.

Stars for NFG 2014 (quilt for Crimson) is my version of a baby quilt. It's quite large but I forgot to measure it! I'd guess it was about 55" square, so large enough for a lap, or small throw, but great for a baby mat or snuggly small child blanket. 

I knew this quilt was for a baby boy, and although none of my quilts are gender specific in my opinion, I tried to make it a bit more boyish. I'm not sure it worked, exactly, but I like how it turned out. I also felt like my usual more muted tones would be too drab so this is my attempt at "bright" colors. 

Center star front

Center star front

I'm going thru a traditional quilt block phase, and this is my first completed quilt using a classic block.  I believe it is a variation of a sawtooth star, but quilters, correct me if I'm wrong.  I made the four large stars first, then used the scraps to create the middle small star. And then I realized that if I didn't add some neutral solid fabric the quilt would just look like a messy jumble. I used one of my favorite go to grays (Connecting Threads Charcoal). to balance out. 

Besides the gray, there is a mix of new and vintage fabric in Stars For NFG. All the gingham is vintage from various places and finds over time, as well as the light blues, rich green, and purpleish strips. The green dots and deep purple are from the same great ebay lot. All the bright greens, blues and teals, are parts of FQs from my favorite quilt shop in VT.  

The vintage gingham had some flaws and one became a tear. I patched it using a smaller piece of the same fabric. 

The vintage gingham had some flaws and one became a tear. I patched it using a smaller piece of the same fabric. 

The back is mostly vintage green gingham with a diagonal patten using deep purple, rich green and charcoal gray. The purple and green backing is a nod to my favorite band who I've been to see with the baby's uncle.  

Back of center star. 

Back of center star. 

I used a new cotton batting and dark blue cotton thread, doubled, for the quilting. I stitched in the ditch for most of the front of the quilt, except inside of some of the stars and the borders.  The back really shows the quilting bc it is light colored and mostly one solid piece of vintage green gingham fabric.  

I rolled the back over and quilted one line of quilting to make a sturdy binding. I have used this rolled method before, which is slightly different than the fold over method in most of my quilts. I wanted the backing to show only a little on the front as to not add too much more busyness to an already busy quilt. 

Stripy binding and quilted border. 

Stripy binding and quilted border. 

This quilt has a lot of firsts. It is my first traditional block quilt, my first finished commission, the first quilt that I have sold, and my first quilt that has a label. 

I used a stamp I had recently made and more of the gray fabric for the label. The stamp is a mad cat, a portrait of Flounder. I used sharpie for the quilt title. I sewed the label on the back of the quilt thru all the layers of the quilt the same way I did the gingham patch on front. I like that it gives it a bit of a punk patch feel, like the ones I used to wear on my jackets. 

It was hard to get the detail of the patch label. I pre washed the label and it faded a bit, but I like the results. 

It was hard to get the detail of the patch label. I pre washed the label and it faded a bit, but I like the results. 

This quilt had a quick time line going from request to finished quilt in three months (May 13 - Aug 8th). I haven't kept track but it may be the fastest I've made a quilt. Bippi was most helpful on this quilt, sitting under it on even hot Summer days. This quilt also did some traveling as I took it along on a few trips to the beach in order work on it. 

Stars for NFG top hanging out at the beach in NJ!

Stars for NFG top hanging out at the beach in NJ!

Bottoms Up Bunny Quilt

My second finish for 2014 started way back at the end of last Summer in Vermont.

I still haven't figured out the best way to photograph quilts in my house. This works for now... At least you get the idea!

I still haven't figured out the best way to photograph quilts in my house. This works for now... At least you get the idea!

The Bottoms Up Bunny Quilt actually started as a quilt back. When I was making Peach Sideways Cities I had gotten a yard of this Windham Fabrics retro print that I thought would be perfect for the back. And I made the back... but ran out of the fabric before completing it. Wanting to see PSC mostly done before I left Vermont, I put the bunny back aside and created a whole new one. It was similar in design but, of course, not quite the same. The more I looked at the original incomplete back, the more I enjoyed it and realized that it could stand on it's own. I had fallen in love with the bunny fabric. 

A lot of hand stitching went into this one.

A lot of hand stitching went into this one.

Back in Brooklyn, I tracked down the fabric. It wasn't easy as it had been discontinued. I only managed to get a yard and a half, but that was more than enough to finish the front. (I used some for the back, as well, and still have about a yard left. Yay!). But I didn't pick the quilt up again until January 2014. 

bub stitch 2.jpg

Bottoms Up Bunny Quilt has a cross type design for it's front with the bunny fabric as negative space. I quilted three lines down each fabric in the cross and then quilted the negative space diagonally. Some of the lines get a bit wonky, as I didn't use any markings. The body is quilted using vintage embroidery thread. 

This quilt differs from most of my others bc it uses almost entirely new fabric. Only the small pink and peach dot fabric is vintage. The back is peiced with material from the front cross, new orange stripes, and of course, some bunny from the front as well. 

I actually like not marking my hand quilting lines. It's great exercise for me to try and get my lines straight. 

I actually like not marking my hand quilting lines. It's great exercise for me to try and get my lines straight. 

It was bound with my fold over method that I use for most of the quilts I make. The binding was mostly stitched with plain white cotton thread. But where bunny meets bunny I used teal embroidery thread. 

I thought the blue went perfectly with the inside of the flowers and that it would break up the bunny on bunny a little. 

I thought the blue went perfectly with the inside of the flowers and that it would break up the bunny on bunny a little. 

This quilt measures about 43 1/2" x 43 1/2" and is almost perfectly square (ha!). My cat Bippi sat under this quilt pretty much the entire time I was hand quilting, so she thinks it's a great couch or lab quilt. I think it would be great for a baby, or play mat, as well. 

I'm linking up with Kathy's Quilts today. Check out her blog!

I'm linking up with Kathy's Quilts today. Check out her blog!

First Finish of Two Thousand Fourteen

What does one do when a quilt spans the years? If most of a quilt was created in one year, but completed in another, what category do we put it under? This is a new dilemma for me, and I'd like to know how others tackle it!

Although most of the work on my latest quilt was done in the latter part of 2013, it was technically finished in the early days of 2014. I struggled with whether to call this a 2013 quilt... But I decided that it will be my First Finish of 2014!!

I really thought this quilt was going to be a regular rectangle. But they always somehow get out of control and go all wonky. That's what I get for not measuing. And I wouldn't have it any other way!

I really thought this quilt was going to be a regular rectangle. But they always somehow get out of control and go all wonky. That's what I get for not measuing. And I wouldn't have it any other way!

This is one of my Squares and Strips quilts, which is what I call my version of a crazy patchwork. I used many browns and blues from my stash, mostly vintage and thrifted. It also contains new fabric. Although the front is mostly brown, it also contains white on white and black. Some of my favorite pieces are repurposed black jeans, some tree fabric that my mom and I thrifted last summer, and a swatch of brown and gold that came to live with my when my husband did. 

There is a patchwork patch of blues on the front that contains some of my all time favorite anchor fabric that I bought new. 

Sometimes not having enough fabric for a backing makes everything more interesting. 

Sometimes not having enough fabric for a backing makes everything more interesting. 

The back has a reverse style design. Mostly blue with a patch of brown patchwork. The main bit of blue comes new from Brooklyn General. The binding on the front also follows this "reverse" theme, blue where the front is brown and brown where the front is blue (pretty much). 

I used some of my favorite precut squares in this quilt. Both vintage and new. 

I used some of my favorite precut squares in this quilt. Both vintage and new. 

This quilt is completely hand pieced, basted, quilted and bound. It's my largest to date and has the most quilting. It was a blast to make and it might be one that I keep for myself. 

My cats Bippi and Tom spent a lot of time with me on this one. It's pretty fun to snuggle under!

My cats Bippi and Tom spent a lot of time with me on this one. It's pretty fun to snuggle under!

Wrinkly Old WIPs

I've noticed there's a lot of quilting lingo out there. Some of the terms I like, some not so much. WIP (Work In Progress) is fine, normal everyday. UFO (UnFinished Object) on the other hand.... Not my favorite. I choose not to use it. (HST [Half Square Triangles], by the way, I quite enjoy.) 

 My sewing work generally breaks down like this:

I always have one or two quilts that I'm really working on at any given moment. Those I don't even consider WIPs bc they are active and getting done. These quilts could be in almost any state of progress. I like to have a few since I sew everything by hand. My hands tend to get tired but not my mind. I need one quilt getting pieced and also one getting quilted or bound. That way, when my hands start to hurt, or I have to give my callouses a day to rest, I can switch up the type of sewing that I'm doing. 

Next I have my ongoings. Little projects that aren't fully formed in my mind, or scrap projects. These are often littered about, sometimes easy to find and add to, sometimes not. These probably don't have a clear ending in mind. When they do, they will most likely move into the first category. Until then, these could be considered WIPs. 

Then there are the theoreticals. These are sometimes stacks I've pulled or stacks I'm adding to. Or fabric I'm just not using bc it seems to have a quilt waiting for it, eventually. Most times, these are only ideas I have for quilts. These really cannot be considered WIPs, bc they don't usually even exist. Yet. 

And lastly, I have the stalled quilts. These are mostly what I really think of as my WIPs. These are mostly quilts that I had to stop bc I didn't have the right fabric for them, or I got to a point where I wasn't sure what to do next, or didn't have the space to complete the next step. Occasionally, these are quilts that I just stopped bc I didn't feel like working on them. Not long ago, I was able to photograph some of this kind of WIPs. 

I started this quilt late last Summer, or during the Fall. I had some reclaimed bright feed sack squares and wanted a really bright vibrant quilt to showcase them. I started making blocks with lots of little fiddly bits and all the yellow I could fi…

I started this quilt late last Summer, or during the Fall. I had some reclaimed bright feed sack squares and wanted a really bright vibrant quilt to showcase them. I started making blocks with lots of little fiddly bits and all the yellow I could find. I made six blocks and started putting them together, but ran out of the right yellows and the motivation. 

This is a quilt I worked on last Fall while working on another that has since been completed. Also using reclaimed blocks, I finished this top pretty quickly, but have stalled out on the back. For many of my quilts I wait to find just the right fabr…

This is a quilt I worked on last Fall while working on another that has since been completed. Also using reclaimed blocks, I finished this top pretty quickly, but have stalled out on the back. For many of my quilts I wait to find just the right fabric to finish. And since I get most of my materials vintage or thrifted, this could take a long time. 

This poor little guy has been waiting a very long time to finish. Started in AZ at my BFF's house in 2010, this mini only needs the quilting and binding finished.  I chose a particularly annoying quilting pattern for this quilt, then lost the t…

This poor little guy has been waiting a very long time to finish. Started in AZ at my BFF's house in 2010, this mini only needs the quilting and binding finished.  I chose a particularly annoying quilting pattern for this quilt, then lost the thread I was using, then, who knows.... One day, it will get done. 

Every once in a while, I pull out these WIPs (plus more. But not too many more...) to look at, remember, or to see if anything in my stash has become usable for. These three may be doomed to stay in the pile, tho, at least for the time being. Just bc I'm not picking up these projects doesn't mean I'm not sewing! I'm making more WIPs all the time. 

The start of one busy quilt...

The start of one busy quilt...

Mad Cat Quilts Welcomes Library Card!

 Only the first week of 2014 and new exciting things are already brewing here at Mad Cat Quilts!

The only thing better than a pile of quilts is being snuggled up underneath them! 

The only thing better than a pile of quilts is being snuggled up underneath them! 

The site has been slightly updated.

The Portfolio section has been updated with better pictures of the 2013 Collection.  The photo are not the complete collection as there are a few things that are still un-given gifts. When the remaining pieces go up, I'll be sure to let you know! 

A link to Mad Cat Quilts official Instagram has been added in the navigational bar. It's gaining followers and I hope to gain more in the coming months. There's an upcoming giveaway planned, so stay tuned for more info!

The Shop has also been updated! Go check it out for new pieces, new prices, and best of all new creators!

Mad Cat Quilts proudly presents the addition of Library Card goods for sale!

 Library Card creates unique handmade items.

 Library Card creates unique handmade items.

Library Card creations are handmade in Brooklyn and feature a variety of useful objects.

To start, Mad Cat Quilts now has Library Card 2 and 3 pocket wallets for sale! These wallets are super soft and made in a variety of interesting pattern and color combos, using new and vintage fabric. Perfect for tucking in your pocket or bag, these little guys are a simple solution for keeping your money and cards. 

again.jpg

Shop update/website update.

There are new items in the shop! Please click "shop" above and check them out! I plan to add more items over the holiday weekend, so check back often. 

I hope to add more product shots to the shop soon, as well. This wintery light is not the best for indoor photos.

I hope to add more product shots to the shop soon, as well. This wintery light is not the best for indoor photos.

As I stated in my previous post, I'm not good at the whole computer thing. Squarespace (http://www.squarespace.com) makes it easy to design a simple and clean website, that's why I chose it. But when it came to making my shop, it wasn't exactly what I was looking for. I decided to go with Bigcartel (http://bigcartel.com/). So you will see that when you go to shop, it now redirects you to my Bigcartel site. 

I'm still working on the shop, making it how I want it and exploring what the site has to offer. Things like packaging and post, combining purchases, and are still in the experimental stages. If you have any questions, please contact me on either site. 

So far I'm very happy with both sites, and can't wait to learn more and become better at working with both. I'm looking forward to more changes in the future, like having my own domain name. I hope to gain more followers to the blog and to sell more items and be able to take commissions. 

As always, thanks for visiting Mad Cat Quilts. Your suggestions, comments and insights are always welcome, as well. 

Visitors and Art Quilts.

Last week, our good friends were in town from Tennessee. It's always nice to have visitors in bc we get to do things that we often neglect living here. Or things that we have wanted to do, but haven't made the time for.

One of our friends is a fiber artist so I was able to easily persuade her to visit The City Quilter (http://www.cityquilter.com/).  I had been wanting to go there for a while, but rarely make it into "the city" (Manhattan). I hadn't realized there was a gallery there and we were lucky to stumble upon a quilt exhibit by Cécile Trentini. Her work was quite varied but I fell in love with her use of unexpected materials, such as daily household items.


A lovely geometric quillt made with coffee filters!

A lovely geometric quillt made with coffee filters!

This one is tea bags!

This one is tea bags!

We bought some lovely fabric, too, of course!

Always room for more fat quarters in lovely prints! The maroon on top is actually a oversized yard that I plan to use as a quilt back one day.

Always room for more fat quarters in lovely prints! The maroon on top is actually a oversized yard that I plan to use as a quilt back one day.

I don't usually go in for novelty prints but these were too fun to pass up! The black is already covered with cat hair, of course!

I don't usually go in for novelty prints but these were too fun to pass up! The black is already covered with cat hair, of course!

I'm glad I was spurred into seeing this shop by my friends, and I won't wait until I have more visitors to go again!

Surrounded by quilters.

The more I think about it, the more I realize that I knew a lot of quilters growing up. They were all around me, casually stitching away. It was common place to see someone making a hexie pillow here, or a quilted eyeglass case there, making squares for collaborative sci-fi quilts or some such. Women were hand stitching, or machine stitching or walking around fabric shops pretty much all my life. It's not surprising that I was inspired by them. 

photo-1.JPG